
Tables and the floor plan
Set up rooms and tables in Tavolify, open a table on the POS, send items to the kitchen and follow tables by colour and time.
1 min readUpdated November 13, 2026
With tables you keep an open bill per table until the guests pay.
Steps
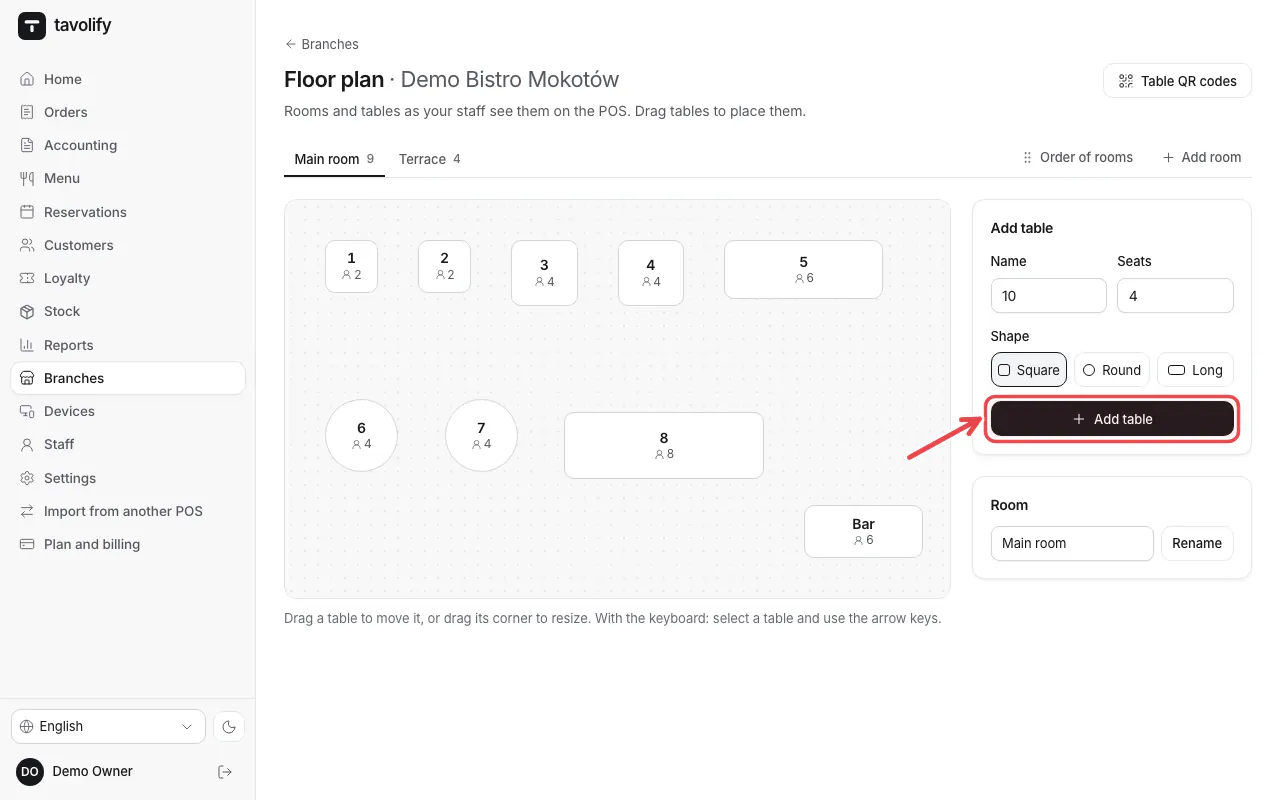
In the admin open Branches → the floor plan of your branch. Tap Add table, set the name, seats and shape, and drag tables into place.
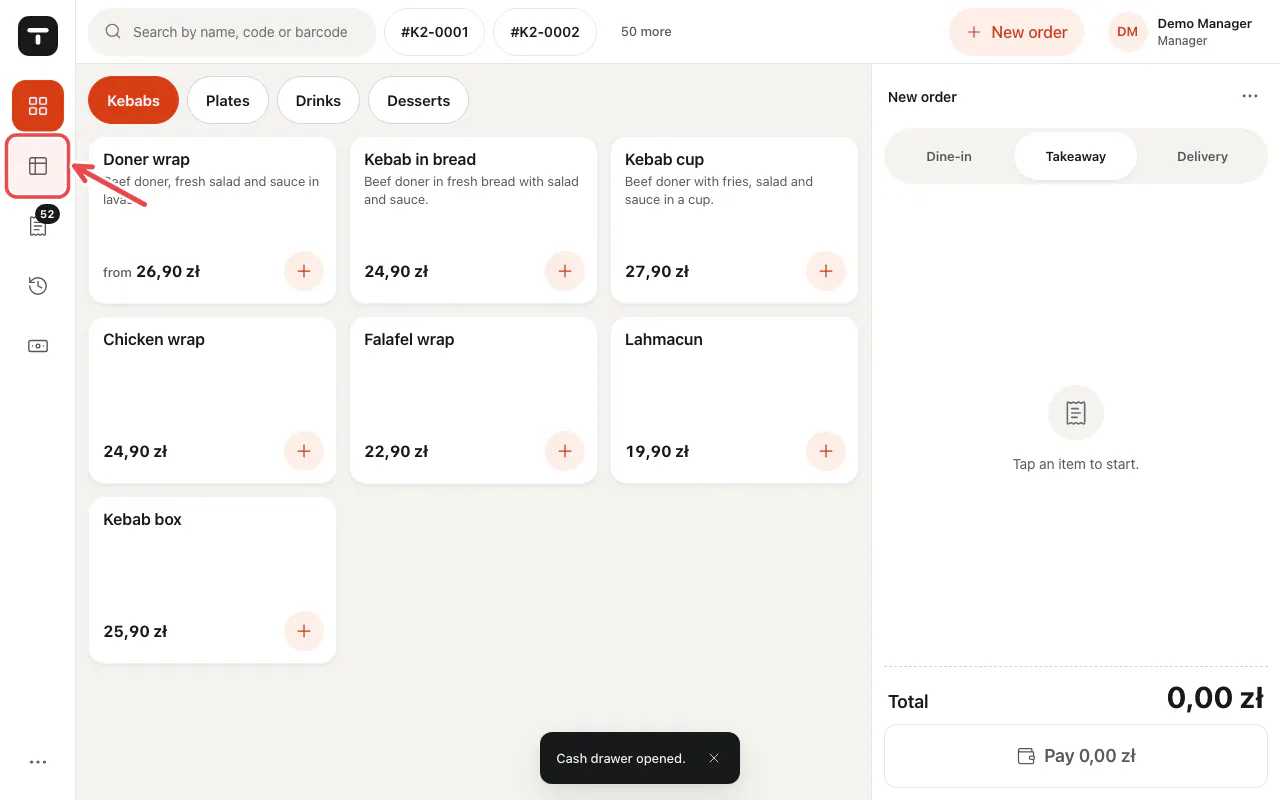
On the POS tap Tables in the left bar.
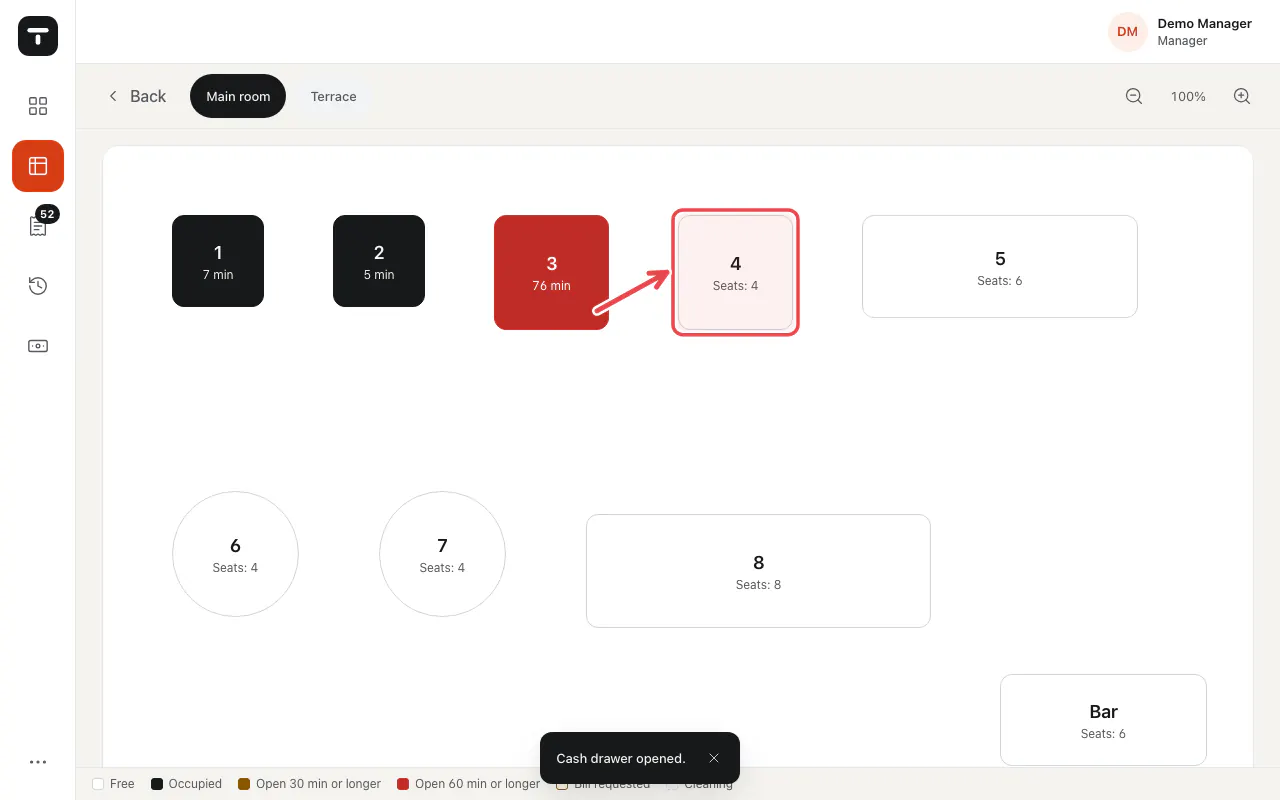
Tap a free table. The ticket opens for that table.
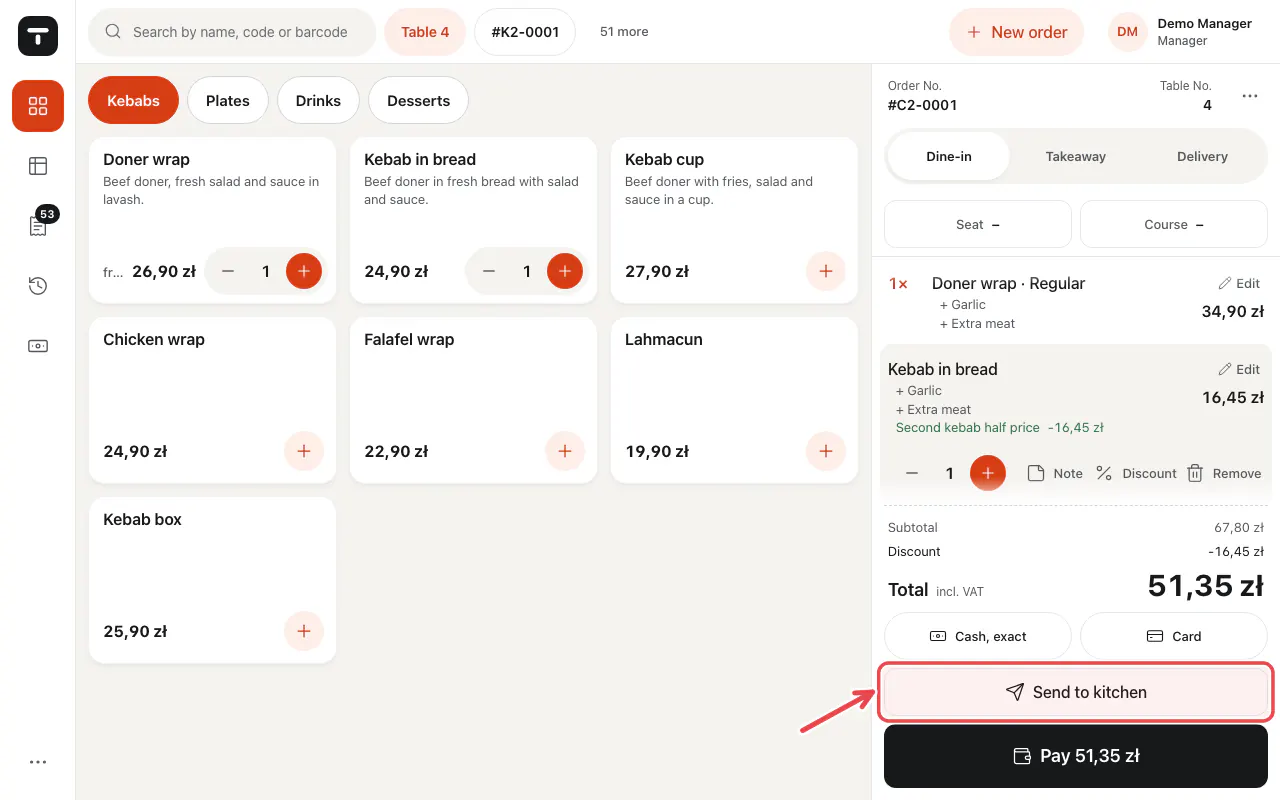
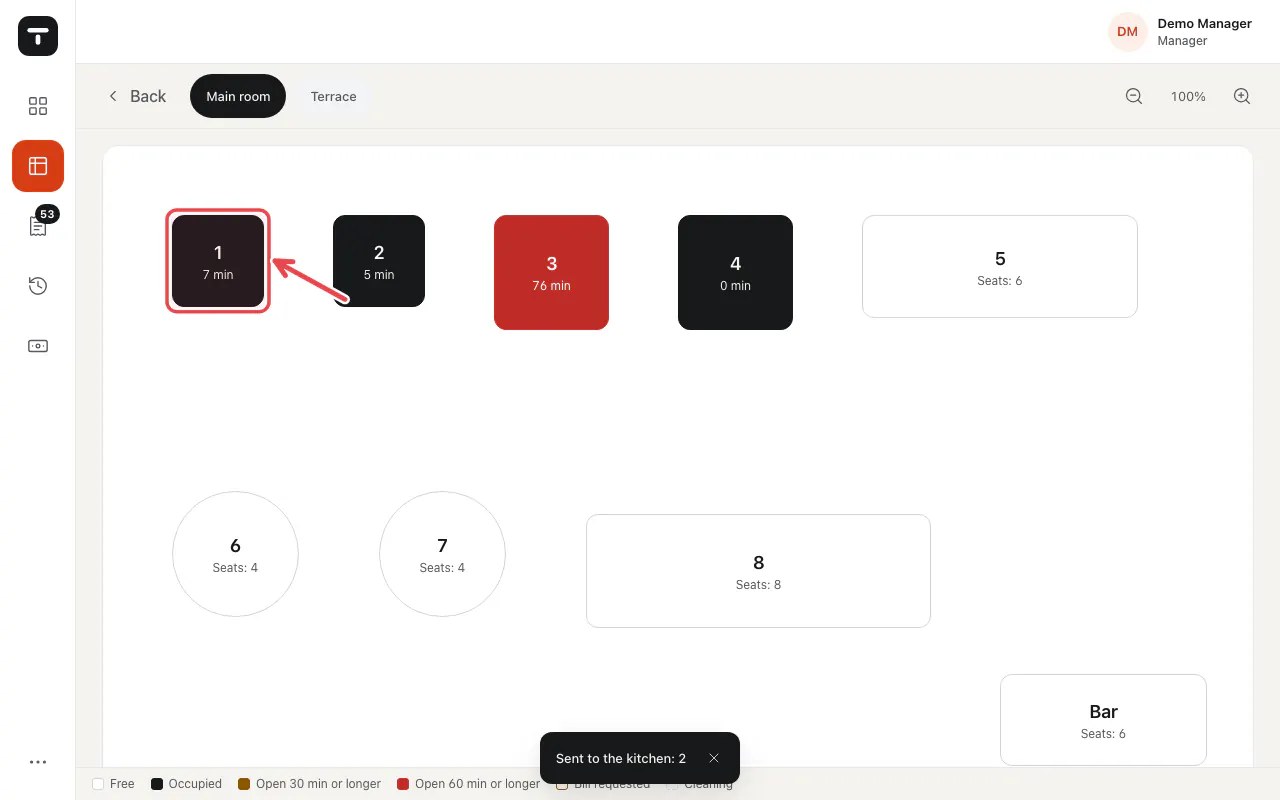
Add the items and tap Send to kitchen.
Occupied tables show how long they are open. The colours at the bottom explain each state.
Related articles
- Split a bill
- QR codes on the tables
- Take an order
Did this answer your question?
Still need help?Our team is happy to answer.
Send us a message