
Finish the setup guide
Set up your restaurant in Tavolify: business type, address and NIP, menu, VAT rates, tables, staff PINs and your first POS.
1 min readUpdated November 13, 2026
The setup guide gets the restaurant ready to sell. Each step can be skipped and finished later; Home shows how far you are.
Steps
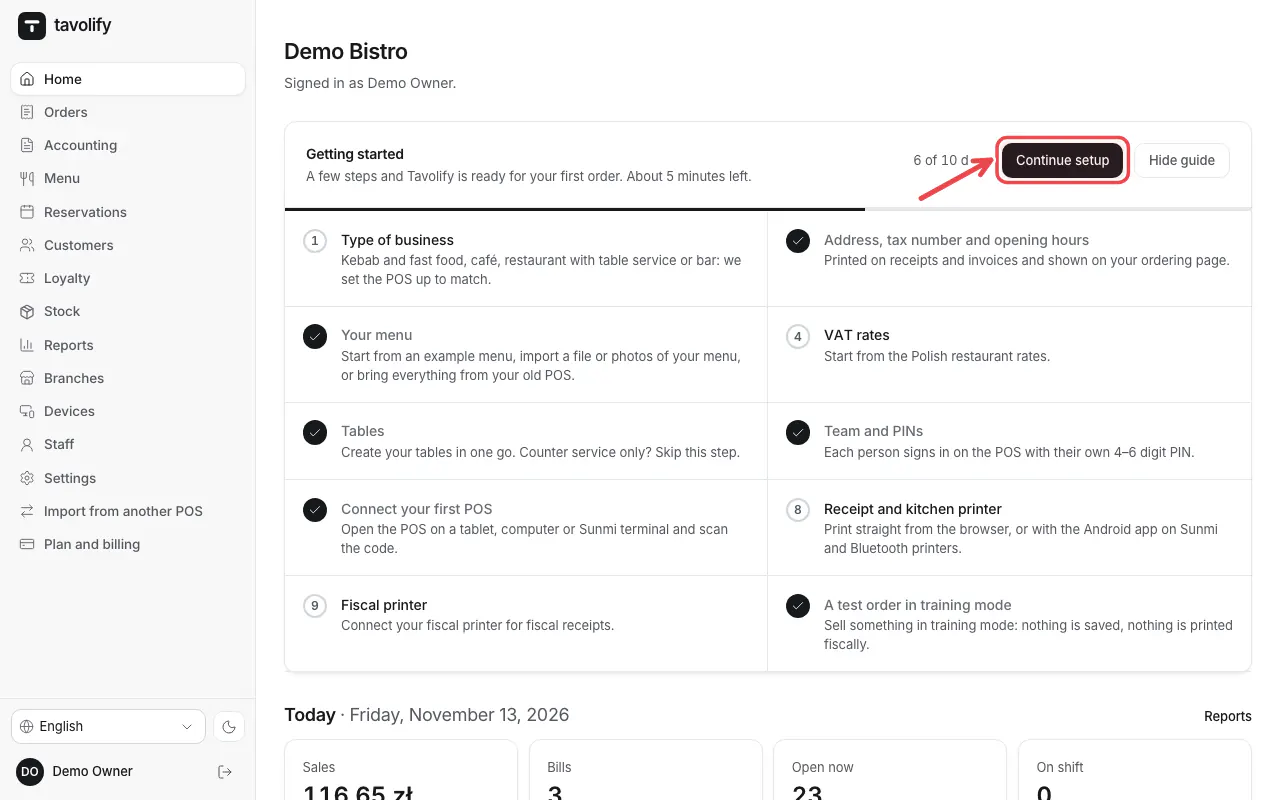
On Home you see Getting started with the steps. Tap Continue setup.
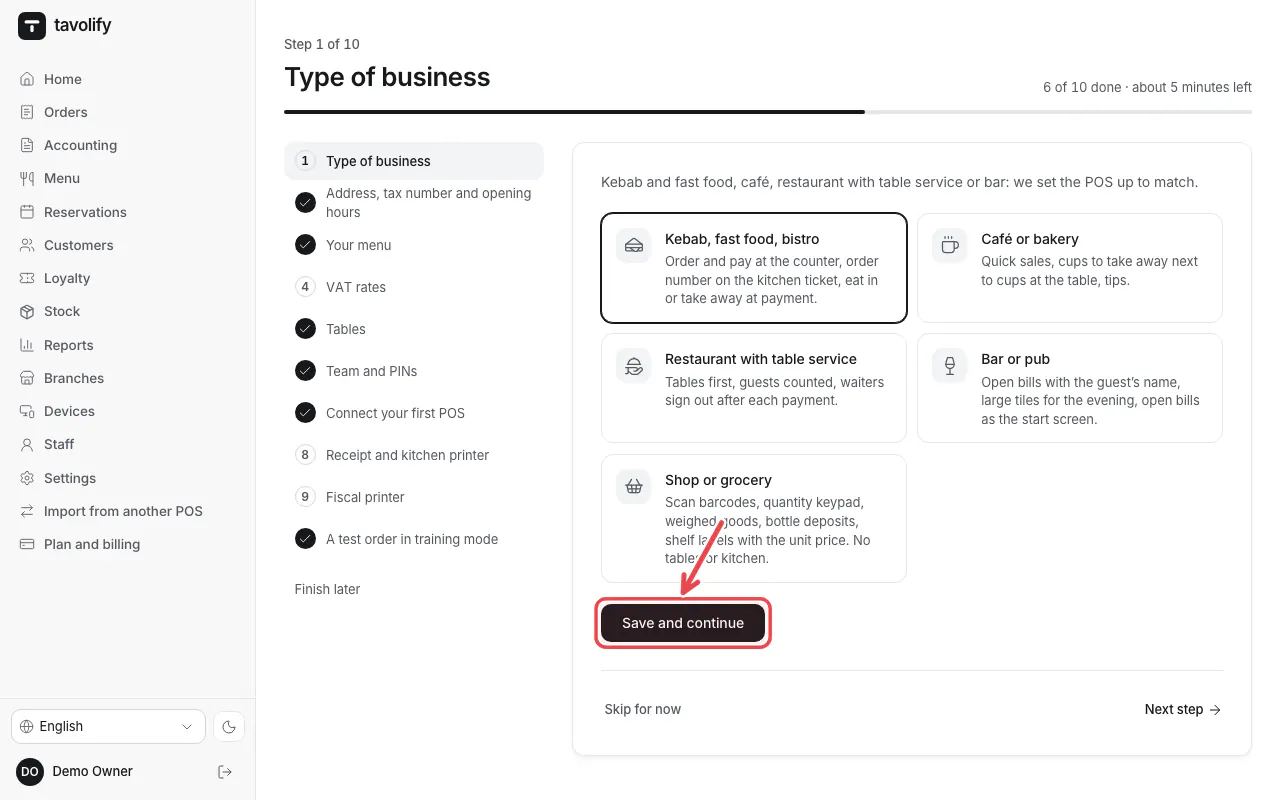
Choose your type of business, for example kebab and fast food, café or restaurant with table service. The POS is set up to match. Tap Save and continue.
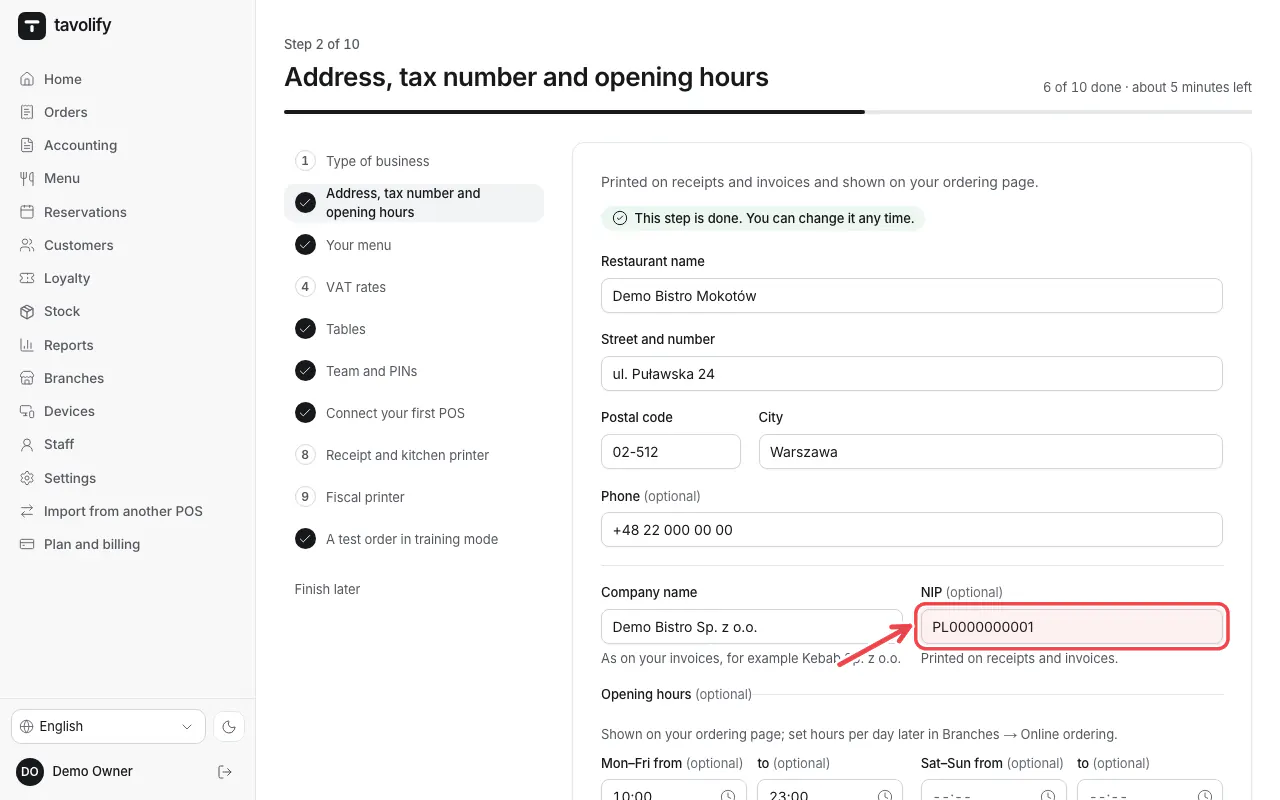
Enter the address, the company name and the NIP. They print on receipts and invoices. Opening hours are optional.
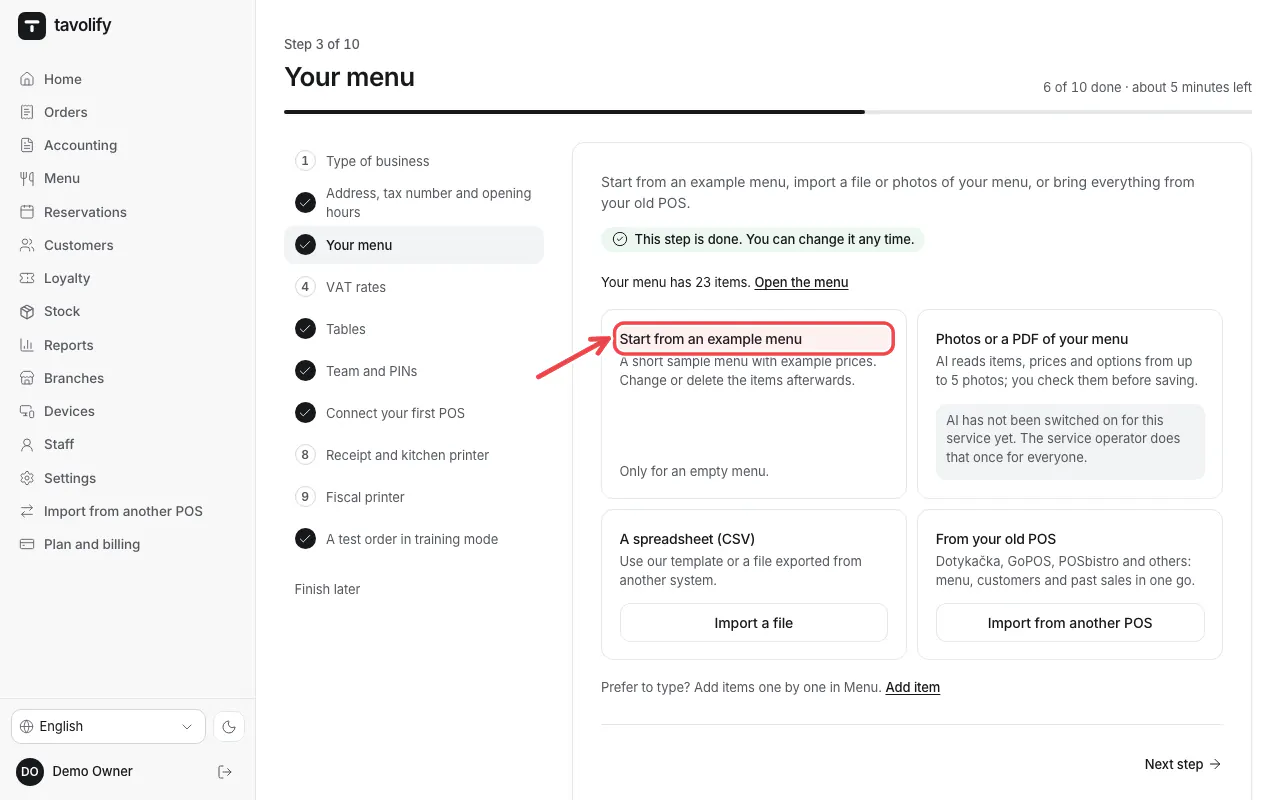
Add your menu: Start from an example menu, import a file or photos of your paper menu, or bring everything from your old POS.
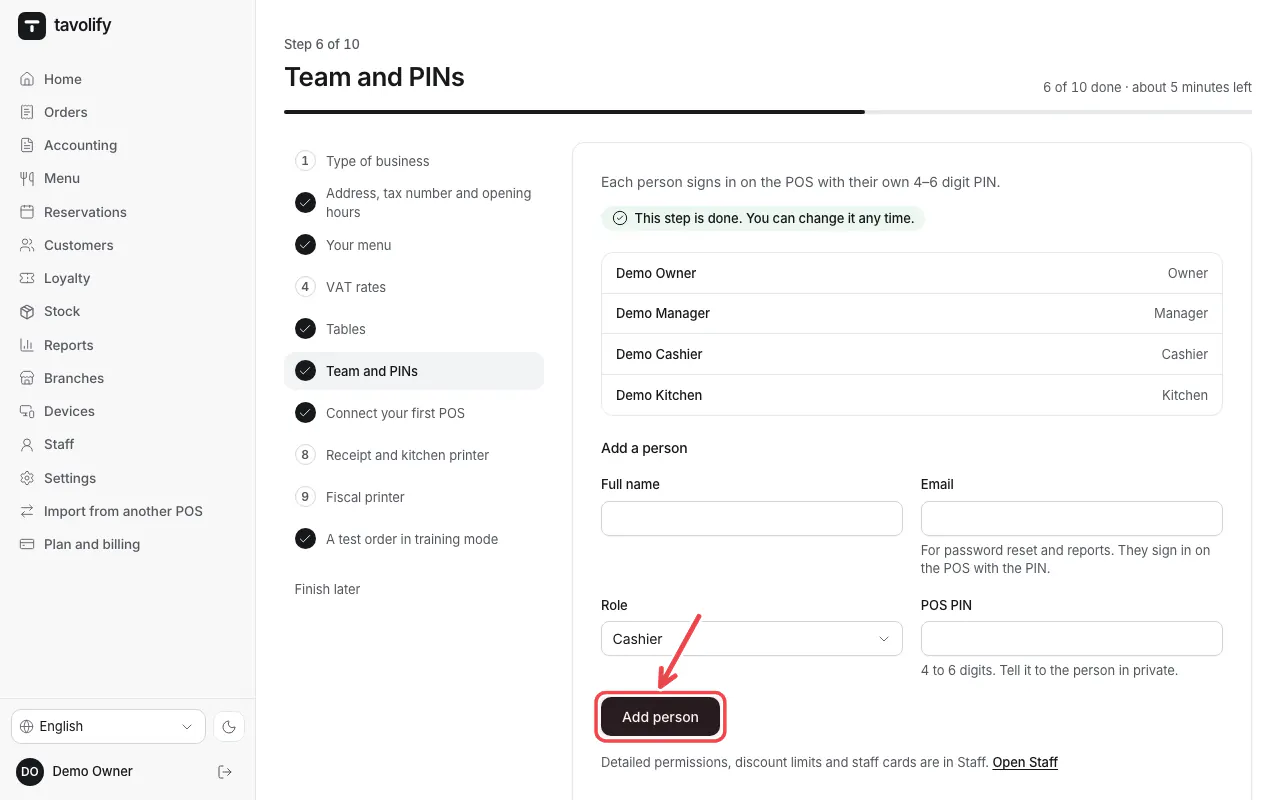
Add your team. Each person gets a 4–6 digit PIN for the POS. Tap Add person for each one.
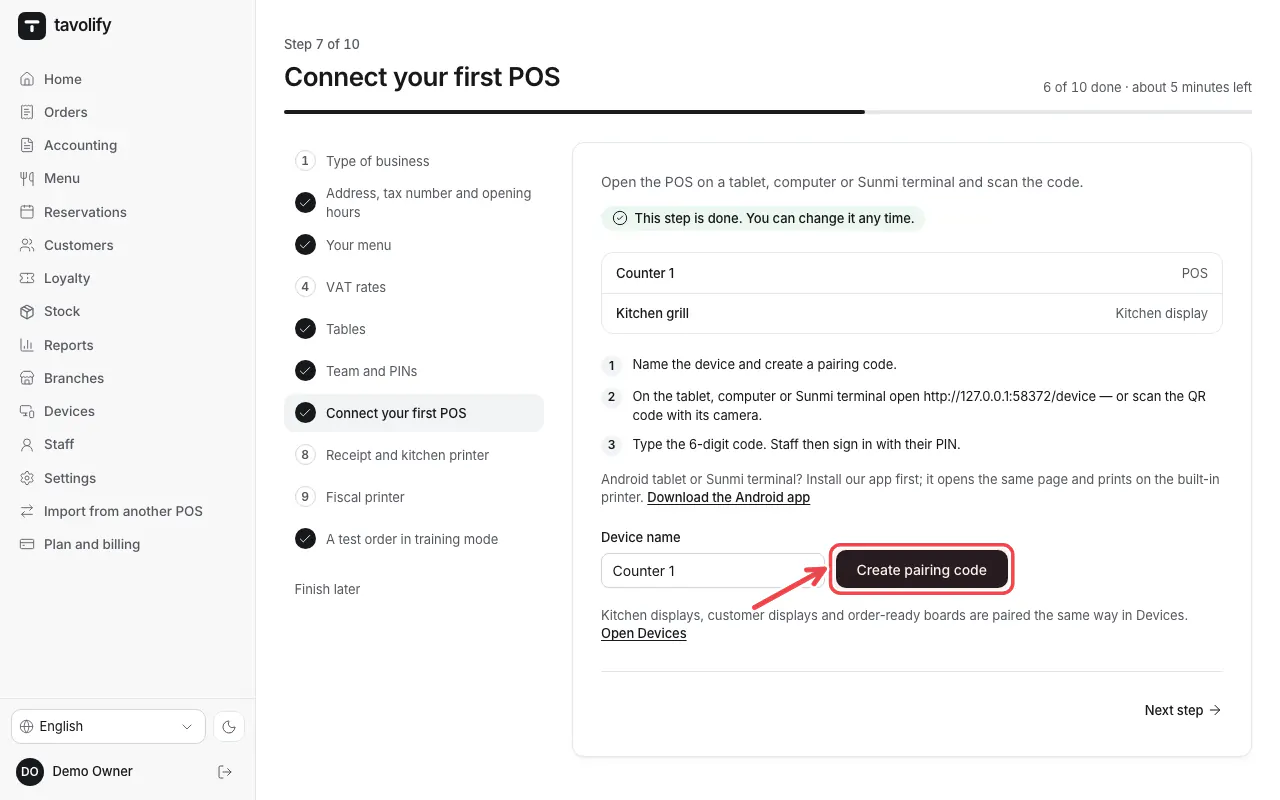
Connect your first POS: tap Create pairing code and type the code on the tablet. The next steps are the printer, the fiscal printer and a test order in training mode.
Tip: Tap Finish later at any time. Your progress is kept.
Related articles
- Create your Tavolify account
- Connect a tablet or computer as a POS
- Add a menu item
- Add staff and set POS PINs
Did this answer your question?